Show/Hide Search Fields
Projects
137 Results Found
 In Progress
 | Cost of Materials: $0.00
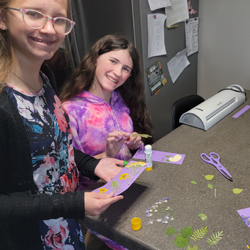
We had a bunch of flower arrangements leftover from the funeral, so we pulled out Savannah's flower press, removed the dried flowers, and added new flowers to dry. We then attached the dried flowers to papers and laminated them to make bookmarks. However, some of the flowers were too thick for the laminator, and pretty much everything got clogged and ruined. We did have one good one of Cooper's, but he accidentally ran it through the laminator a second time and it got destroyed. The kids were very disappointed.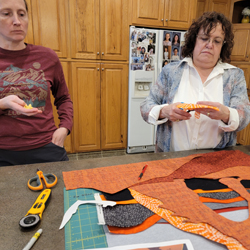 In Progress
 | Cost of Materials: $0.00
Tara and I made this landscape quilt of Delicate Arch with lots of help from my mom. It uses a technique of sewing each layer on top of the last one and quilting as you go.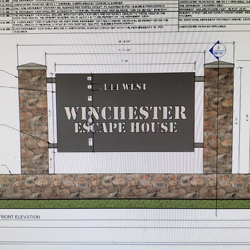 In Progress
 | Cost of Materials: $0.00
A monument sign at our Payson property.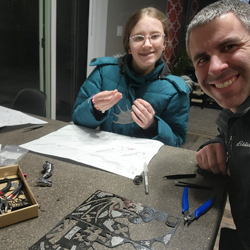 In Progress
 | Cost of Materials: $0.00
Savannah made a steel model kit of the London Eye. I made one of a butterfly. Savannah and I are working on a model of a dragon.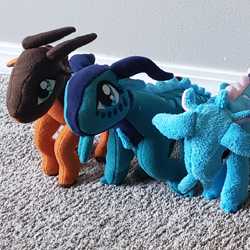 In Progress
 | Cost of Materials: $0.00
Mamaw, Savannah, Madilyn, and Becca sewed a ton of stuffed dragons from Wings of Fire.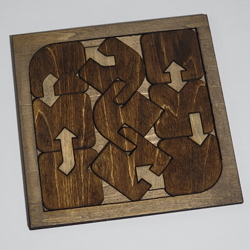 Completed on January 27, 2025
 | Cost of Materials: $0.00
I used my laser cutter to manufacture personal copies of several puzzles designed by others.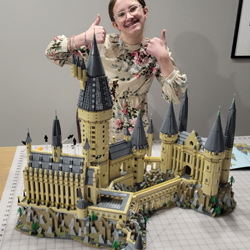 Completed on January 5, 2025
 | Cost of Materials: $0.00
The kids have gotten numerous Lego sets for birthdays and Christmases. Notable among them are the Hogwarts Castle, Ideas Tree House, and several Friends sets.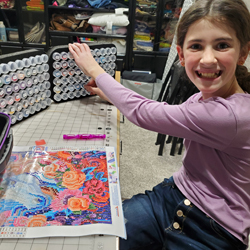 Completed on December 25, 2024
 | Cost of Materials: $0.00
The whole family, but especially Madi enjoys doing diamond art projects. We have completed dozens over the years. Madi especially likes to listen to audio books while doing diamond art.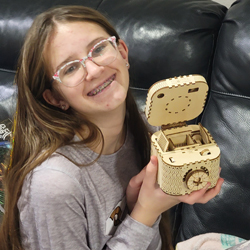 Completed on December 25, 2024
 | Cost of Materials: $0.00
We have all built many many of these wood STEM kits. They are a favorite for birthdays and Christmas. The kids have even saved up and bought a few for themselves.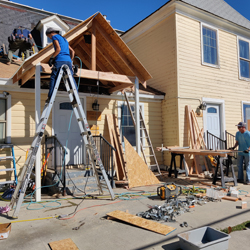 Completed on December 7, 2024
 | Cost of Materials: $0.00
We reroofed our Payson property. It was a huge project for a number of reasons. There were 2 and sometimes 3 layers of asphalt shingles that we had to strip off. Under those shingles were 2 layers of cedar shakes that we also removed. We filled up the dump trailer completely full 3 times with more than 6,000 pounds of shingles, not including the huge piles of cedar shakes that we burned in an effort to remove some tree stumps. We put down all new OSB sheathing, ice and water shield, tar paper, and shingles. We also redid all the drip edge flashing and waterproofed the flat roof portions. On top of all that, we also extended the back porch roof and built a new porch roof over the side entrance stairs.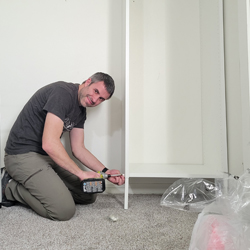 Completed on December 2, 2024
 | Cost of Materials: $0.00
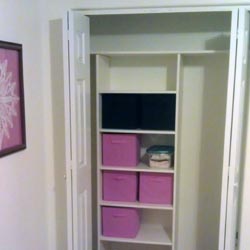
We built two rows of shelves and drawers and installed a high and a low closet rod in Cooper's closet. The material came from Ikea.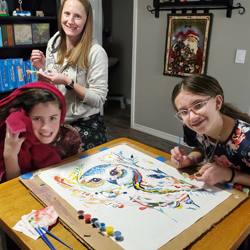 Completed on November 24, 2024
 | Cost of Materials: $0.00
Savannah and Madi have painted several paint-by-numbers over the years.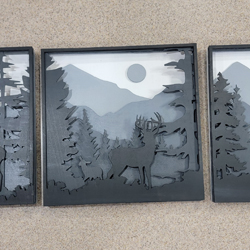 Completed on November 20, 2024
 | Cost of Materials: $0.00
August 8 - I designed the three forest panels to laser cut. It was pretty easy because I was able to use stock imagery and just trace the outlines very quickly.
August 9 - I started laser cutting the different forest scene layers. There are seven layers per panel for a total of 21 boards.
August 10 - I randomly woke up at 5:45. I was excited to do some more laser cutting, so I ended up getting up and staying up. I swapped out wood pieces throughout the day to get almost everything cut out.
September 13 - I painted the layered wood forest scene. The back layer is white and each layer gets darker until the front layer is black.
September 17 - I painted the edges of the wood forest scene so now those are completely done.
September 26 - I designed two more forest scene panels to laser cut. Having just three of them above our bed looks a bit funny because they're too small, so I'm going to add two more to make it five.
October 14 - My new box of wood arrived, so I started laser cutting some more pieces for the forest scene in our bedroom.
October 15 - I did some more 3D printing and laser cutting.
October 20 - I finished laser cutting the last of the forest scene layers.
November 16 - I started a 3D print then spent all morning painting the multiple layers of laser cut forest scenes.
November 17 - I glued wood layers together for the forest scene craft.
November 19 - I painted the edges of the forest scene.
November 20 - Project complete!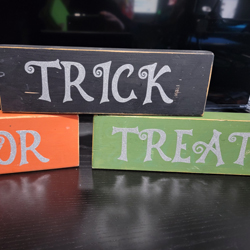 Completed on November 10, 2024
 | Cost of Materials: $0.00
We used the Cricut to cut out vinyl letters for this trick or treat decoration.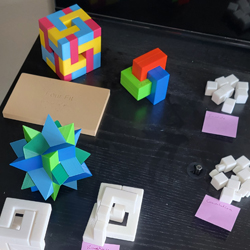 Completed on September 29, 2024
 | Cost of Materials: $0.00
I 3D printed a bunch of mechanical puzzles for myself and as gifts for others.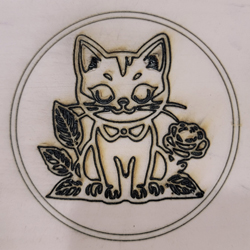 Completed on September 5, 2024
 | Cost of Materials: $0.00
We used the laser cutter to cut the outline of the stamp then carved out the unwanted areas. At first, we tried to burn away all the unwanted areas, but that didn't work at all. It just turned the whole thing into a cancerous blob.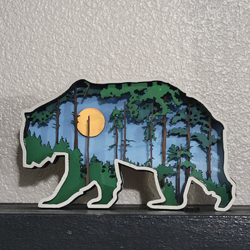 Completed on July 31, 2024
 | Cost of Materials: $0.00
I downloaded some files from Etsy and laser cut three different multilayer animals: an owl, a bear, and a wolf. Tara and the kids painted them. Completed on July 20, 2024
 | Cost of Materials: $0.00
I paid someone to install the block wall along the back property line of our Payson property. He didn't build it quite the way I had hoped.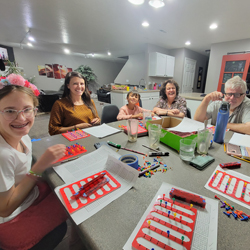 Completed on July 1, 2024
 | Cost of Materials: $0.00
This puzzle was my dad's exchange puzzle for IPP41 in Houston, TX. For each challenge, start by placing the colored pegs into the frame in the same pattern as shown in the challenge booklet. Place the slat pieces into the frame to create a continuous trail for each color. Each horizontal row of colored pegs must have 1 peg of each color.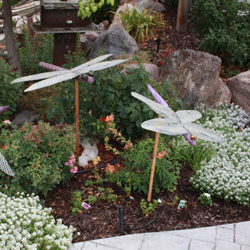 Completed on April 19, 2024
 | Cost of Materials: $0.00
This DIY dragonfly yard art project repurposes painted table legs as whimsical dragonfly bodies and uses sheet metal to craft dynamic, decorative wings. This imaginative craft offers a creative way to recycle materials while adding unique charm and personality to your outdoor space.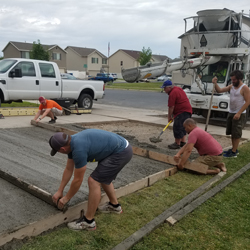 Completed on March 23, 2024
 | Cost of Materials: $0.00
This project at our Spanish Fork home involved installing a concrete driveway extension and RV pad to enhance parking space, adding vinyl fencing and gates to finish fencing in the backyard. We also added concrete flowerbed edging, creating a clean, polished border for improved landscaping aesthetics.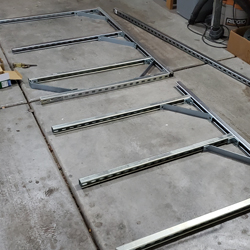 Completed on February 3, 2024
 | Cost of Materials: $0.00
I built some canoe and kayak racks out of strut channels and corner brackets. The kayaks and paddles are stored vertically, and the canoes are stored horizontally.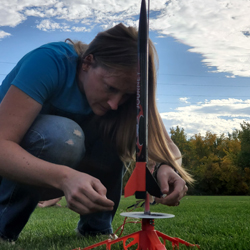 Completed on October 22, 2023
 | Cost of Materials: $0.00
We built four model rockets as a family then took them to the park to launch them. On Monday, Tara had dinner on the table when I got home from work. We ate quickly and then biked over to the sports park. We set up the model rocket launch pad and launch the first rocket. By that point, it was getting dark. The glue holding the elastic piece that connects the nose cone to the body disconnected so the model fell in two pieces. Luckily we were able to find both of them even though it was getting dark. We tested our luck and launched the second rocket. That was a mistake because we couldn't see it at all once it was more than a few feet in the air. That rocket also split into two pieces, but by some stroke of luck we were able to find both of them. When we light the rockets again, we'll have to make sure to do it earlier in the day. We went back in October for round two. It was a lot of fun and we recovered all the rockets, even the one that made a massive arc and ended up in the parking lot way out of eyesight. Someone else saw it land and was able to point us in the right direction. Completed on April 15, 2023
 | Cost of Materials: $0.00
We built 6 raised garden beds on our side yard out of split faced CMU. They are 4' x 6' outside dimensions with drip sprinklers and metal arches for vines to grow on. In between the raised garden beds and along the rest of the side yard, we put down 4"x8" red pavers in a herringbone pattern. It took us several years to finish the project, but we're quite pleased with the results.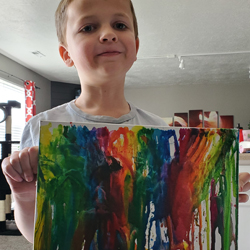 Completed on April 2, 2023
 | Cost of Materials: $0.00
We made some crayon art by taping crayons to the top of a blank canvas and using a heat gun to melt wax in a rainbow pattern.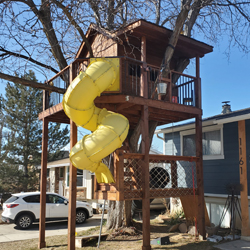 Completed on February 18, 2023
 | Cost of Materials: $0.00
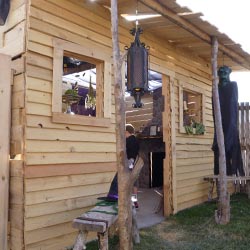
I helped my brother Anthony build a tree house in his front yard. It features an enclosed room, a two-sided balcony, a tube slide, a climbing wall, and a dumbwaiter. 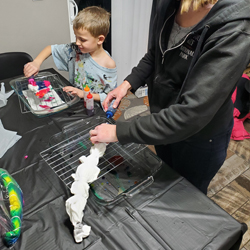 Completed on December 27, 2022
 | Cost of Materials: $0.00
We tie-dyed several pillowcases and clothes items as a family. Completed on August 4, 2022
 | Cost of Materials: $0.00
The installed an island in our kitchen. The base cabinets came from Ikea, and we purchased the solid surface countertop through Home Depot. We were fortunate that they had a color almost identical to our existing countertops.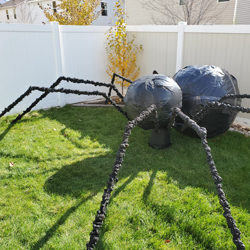 Completed on October 30, 2021
 | Cost of Materials: $0.00
We built a giant spider for a Halloween prop. The legs are made out of PVC wrapped with burlap, injected with expanding foam, and painted black. The body is beach balls wrapped with black plastic.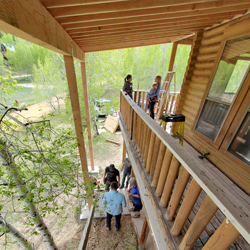 Completed on May 29, 2021
 | Cost of Materials: $0.00
We relocated the cabin stairs around the corner and built a roof over the top of the deck and stairs.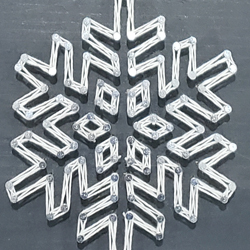 Completed on December 14, 2020
 | Cost of Materials: $0.00
We made several nail art craft project for Christmas including snowflakes and a snowman scene. Completed on August 8, 2020
 | Cost of Materials: $0.00
We buried two poles in the ground and attached some eye bolts to the house so we could string up 3 triangle shade canopies over our back patio. Completed on May 30, 2020
 | Cost of Materials: $0.00
My dad and uncles built a fort at our family cabin in 1996, and it stayed unchanged for many years. In 2020 we added two extra levels to the top of the fort.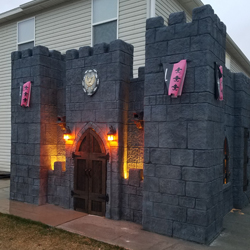 Completed on April 26, 2020Build time: 1 year | Cost of Materials: $5000.00This castle playhouse has two levels. The upper level is mostly open with a raised lookout platform in one turret. Access to the upper level is by a ladder on the back or an elevator in one of the turrets. The downstairs has a theater stage with moving curtains, color-changing lights, changeable backgrounds, and storage under the stage floor. One of the turrets has a jail cell with a swinging metal door. The other turret has the elevator to the upstairs. A talking tube embedded in the wall lets people upstairs and downstairs communicate. Also downstairs is a cabinet with a concrete countertop, a magic mirror on the wall, cedar ceilings, chandeliers, arched windows with hinged shutters and metal bars, and a murphy table with two benches. The front has accent lighting, porch lights with flickering flame lights, a coat of arms, hinged front doors, and a motorized portcullis gate that goes up and down.
 Completed on March 16, 2020
 | Cost of Materials: $0.00
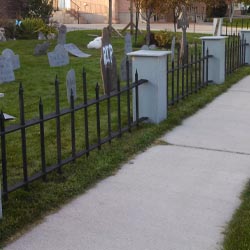
I built some adjustable shelves in the garage to hold bins of screws and other hardware. I used wood salvaged from my haunted house fence pillars. Completed on February 15, 2020
 | Cost of Materials: $0.00
We added a new door from our garage to our side yard. It was a bit tricky because there were some trimmers we had to support in place and we had to peel off and put back a bunch of siding on the exterior. Completed on February 1, 2020
 | Cost of Materials: $0.00
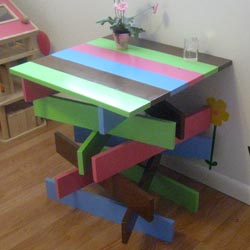
After searching for a long time for the right table but not finding one we liked, I built a concrete tabletop for our kitchen. The table top is 4.5 ft by 4.5 ft and seats 8 people. I ordered the steel legs through Amazon for about $950. The sealer was a few hundred dollars, the wood for the forms was pricey, but the concrete itself was very cheap. I added portland cement to the concrete mix to make it stronger and mixed in coloring to make it darker. I also inlaid 3/4" plywood in the center portion to displace the concrete and make it lighter. The tabletop alone weighs several hundred pounds. After the concrete cured for a couple days, I started the grinding process. It took so many hours of grinding. Since I was in the garage and the process was incredibly messy, I set up the canopy over the table and hung tarps from the canopy to protect the rest of the garage. I ran a hose into the garage to keep things wet, and it was freezing cold because I was working in the winter. After I exposed the aggregate and ground it smooth, I learned that I had polished it too smooth for the finish to adhere to. So I used some acid to rough up the surface. I regret that choice because it made little pits in the surface that are very abrasive on our washrags when we wipe down the table. All in all though, I'm very proud of this project and it's a major talking point whenever we have guests over. Completed on January 11, 2020
 | Cost of Materials: $0.00
I built these adjustable shelves in our master bathroom to hold our laundry baskets.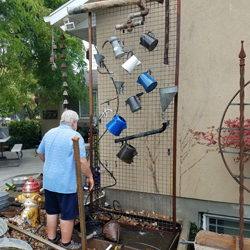 Completed on September 28, 2019
 | Cost of Materials: $0.00
This outdoor water sculpture uses a metal grid wall adorned with watering cans, funnels, pipes, springs, and chains to create a dynamic water feature where water cascades, splits, and recombines as it flows from top to bottom. The design offers a playful, artistic display that brings movement and sound to gardens or outdoor spaces.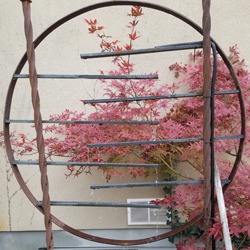 Completed on September 28, 2019
 | Cost of Materials: $0.00
This water sculpture project is built from a metal circle with interlaced steel channels, allowing water to drip and flow from one channel to the next in a cascading pattern. The elegant design creates a mesmerizing, continuous water movement, adding a dynamic and soothing feature to outdoor spaces. Completed on March 28, 2019
 | Cost of Materials: $0.00
We bought a used couch off KSL and reupholstered the cushions. We also used fabric paint to darken the black back and armrests. Completed on March 17, 2019
 | Cost of Materials: $0.00
We built these bunk beds for our family cabin in Scofield. Previously, the upstairs bedroom could only sleep 2 or 3 people because it had just one king bed in it. We ended up building a three-level queen bunk bed in that room to sleep 6 people. We also built another queen bunk bed and a twin bunk bed for the downstairs family room. The beds were built mostly out of 2x4s, 2x6s, 4x4s, and 1x4s. We used salvaged wood for a lot of it, so they only cost about $300 total for 7 beds.  Completed on December 25, 2018
 | Cost of Materials: $0.00
I made this plant table out of stair balusters for the frame and 1x4 trim boards, with a sheet metal top. The paint didn't adhere perfectly to some of the boards and left little circles of non-painted areas. It's a little bit flimsy in the long direction because there aren't any diagonal braces that direction. Completed on November 10, 2018
 | Cost of Materials: $0.00
I built this little charging station for my cordless tools in a couple hours using scrap wood. It's not pretty, but it's functional. Completed on November 8, 2018
 | Cost of Materials: $0.00
I insulated our garage door using a couple sheets of rigid insulation.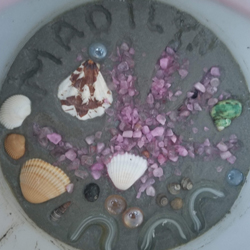 Completed on July 16, 2018
 | Cost of Materials: $0.00
This DIY project creates custom circular concrete stepping pavers for a garden, featuring decorative elements like marbles, glass stones, shells, and imprints for personalized flair. The result is a unique, artistic pathway that adds charm and character while enhancing the landscape’s functionality.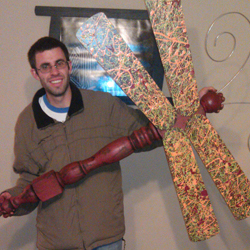 Completed on May 12, 2018
 | Cost of Materials: $0.00
The DIY dragonfly yard art project transforms painted table legs into dragonfly bodies and repurposes ceiling fan blades as wings, creating a unique and colorful outdoor decoration. This creative and eco-friendly craft allows for personal design choices and adds a playful, artistic flair to any garden or yard. Completed on January 20, 2018
 | Cost of Materials: $0.00
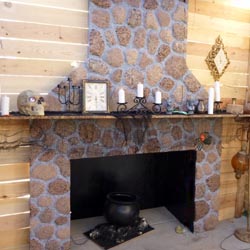
We did some upgrade to our fireplace surround and mantle. We added shiplap to the wall behind the fireplace. Then we built a wood mantle and posts around the fireplace insert. We then tiled the wall directly around the insert. We're pretty proud of how it turned out. Completed on September 19, 2017
 | Cost of Materials: $0.00
When we moved into our new house, the pantry just had some small wire shelves in it. It was a complete waste of space and not at all functional. That was one of the first upgrades we made to the house when we moved in. We built floor-to-ceiling shelves on all 3 walls. Most of the shelves are adjustable. If I were to do the project again, I would use particle board instead of MDF for the shelves since the shelves bow quite a bit under the weight of the food.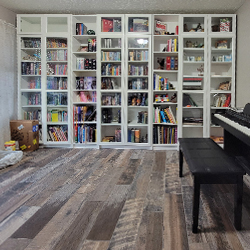 Completed on August 29, 2017
 | Cost of Materials: $0.00
Shelves from Ikea. Completed on August 26, 2017
 | Cost of Materials: $150.00
We framed a 4-ft by 10-ft pieces of sheet metal on our wall to display our magnet collection.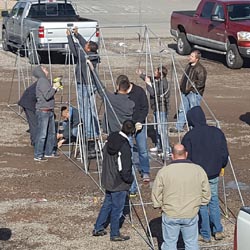 Completed on December 10, 2016Build time: 40 hours | Cost of Materials: $600.00Jones & DeMille Engineering sponsored a float in the Richfield, UT Christmas Light Parade. This year's float was a 40-foot-long bridge made out of electrical conduit. We hung the bridge from a truck and a 4-wheeler.
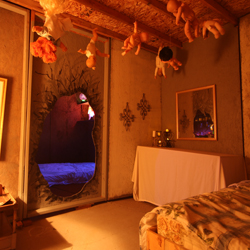 Completed on October 31, 2016
 | Cost of Materials: $0.00
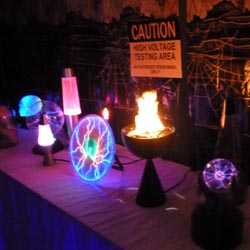
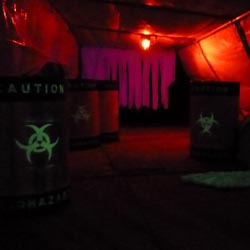
This scene included a bedroom with bed, nightstand, and lamp. It also included a 2-way mirror above the night stand where an actor could dim the room lights and illuminate themselves so they show up as a ghost in the mirror. We also hung a bunch of baby dolls from the ceiling for effect. Completed on June 10, 2016
 | Cost of Materials: $0.00
I bought an old trailer frame that used to be a jobsite trailer before it burned down. We cut 6' off the back so it was about 14' long and moved the axle forward. Then we attached wood planks and built an A-frame canoe rack on top of the trailer. The center has storage space for life jackets, rafts, paddles, and other water equipment. The trailer held 6 canoes plus our 5 kayaks. We used it for almost 10 years before it fell apart. Rather than rebuild it, we removed the canoe rack portion, repaired the planks, and sold the trailer.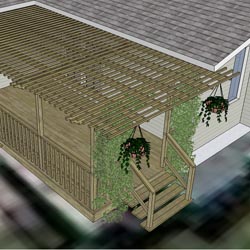 Completed on June 3, 2016Build time: 2 months | Cost of Materials: $400.00We added a pergola roof over our deck. It was a little bit tricky because we had to replace the posts holding up with deck without the deck falling down.
 Completed on November 18, 2015
 | Cost of Materials: $0.00
I built a custom camera jib crane from aluminum tube steel, hinges, pulleys and other hardware. It folds up for easy carrying.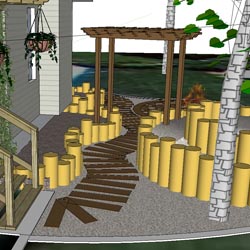 Completed on July 16, 2015Build time: 2 years | Cost of Materials: $1500.00In the backyard, we added a railroad tie path from the back deck on the north side of the house to the patio on the south side of the house. We added some terraced flowerbeds, an herb spiral, a pergola trellis, a wishing well, several trees, and a patio.
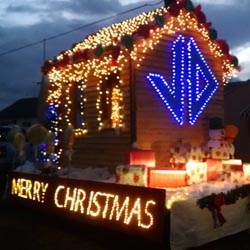 Completed on December 13, 2014Build time: 40 hours | Cost of Materials: $0.00Jones & DeMille Engineering sponsored a float in the Richfield, UT Christmas Light Parade. This year's float was a gingerbread house with lots of lights, projected falling snow, and a gingerbread man.
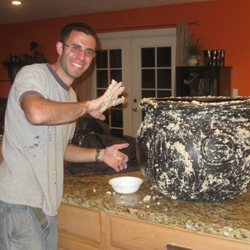 Completed on October 31, 2014
 | Cost of Materials: $0.00
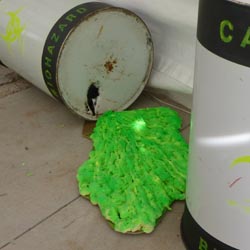
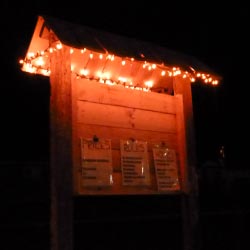
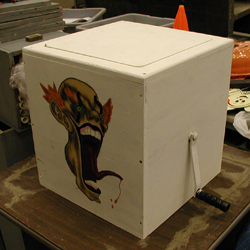
I took a boring plastic cauldron and made it look more authentic. At first, I tried smearing oatmeal on the outside like someone suggested online, but as soon as it dried, it flaked off and made a mess. The method that worked a lot better was to take PVC sawdust from my graveyard fence project and mix it with Liquid Nails construction adhesive and smear it all over the outside in patches. Then I painted the whole thing with reds and oranges to look like rust and burned food.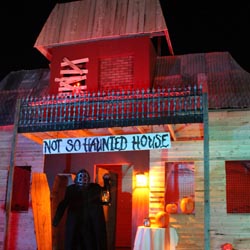 Completed on October 23, 2014Build time: 50 hours | Cost of Materials: $1250.00This haunted house facade goes in front of our garage door and serves as an entrance into our haunted house walk-through. The facade is two stories tall with a salvaged sheet-metal roof on the lower level and a wood roof on the upper level. The finish is 7/16" plywood on the inside and 1x6 wood lap siding on the outside. The haunted house facade can be disassembled into 8 ft. by 8 ft. panels for easy storage.
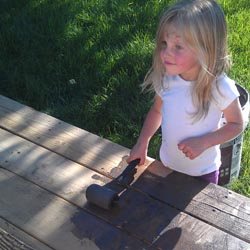 Completed on July 8, 2014Build time: 10 days | Cost of Materials: $600.00These wooden benches go on our patio around the fire pit.
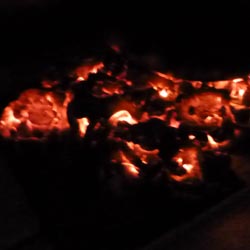
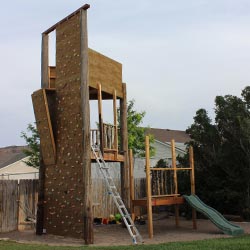 Completed on June 16, 2014Build time: 150 hours | Cost of Materials: $1000.00We made this rock climbing wall with used utility poles and pressure-treated plywood. There are two levels on the back side. The total height is 22.5 feet tall. There is a rappelling platform fifteen feet up.
 Completed on May 24, 2014
 | Cost of Materials: $0.00
Building your own 4 Square in the Air game out of PVC is a fun and cost-effective project that involves constructing a large cube-shaped frame using lightweight PVC pipes and connectors. The game is easy to assemble, portable, and provides a creative twist on the traditional 4 Square by adding a vertical dimension for enhanced play.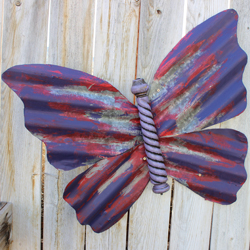 Completed on May 2, 2014
 | Cost of Materials: $0.00
Creating butterfly yard art from painted table legs and sheet metal is a charming DIY project that repurposes old furniture legs as colorful butterfly bodies and shaped metal pieces as wings. This whimsical craft allows for endless creativity in design and adds a vibrant, personalized touch to your outdoor space.
 Completed on April 6, 2014
 | Cost of Materials: $0.00
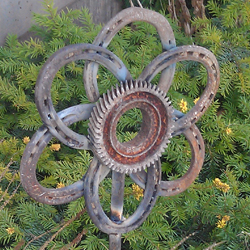
This DIY horseshoe flower project repurposes metal horseshoes into charming floral-shaped yard art by welding them into petal patterns. This creative craft brings a rustic, decorative touch to outdoor spaces while giving new life to old materials. The centers of the flowers can be old gear sprockets or any other circular metal object.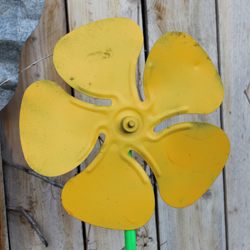 Completed on March 25, 2014
 | Cost of Materials: $0.00
This DIY yard art project transforms painted fan blades into vibrant, petal-like shapes to create eye-catching metal flowers for outdoor decoration. With creativity and colorful paint, it’s an inventive way to repurpose old fan parts and add whimsical charm to gardens or lawns.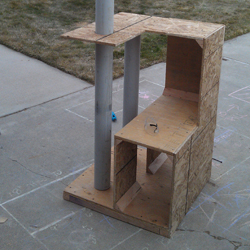 Completed on February 24, 2014
 | Cost of Materials: $0.00
This DIY cat condo project uses wood for a sturdy frame and carpet for comfortable, scratch-friendly surfaces, creating a cozy and engaging space for cats to climb, lounge, and play. This customizable project offers endless design possibilities to suit your cat’s needs while complementing your home decor.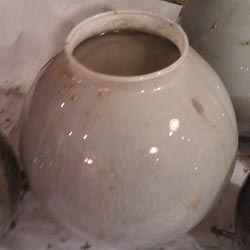 Completed on December 15, 2013
 | Cost of Materials: $5.00
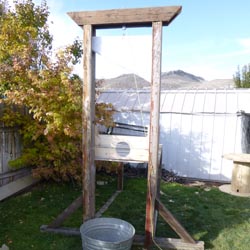
These garden globes are made by pouring concrete inside a glass light fixture globe and then decorating the outside.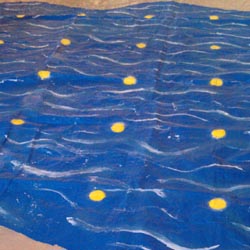 Completed on November 21, 2013Build time: 6 hours | Cost of Materials: $37.00River Crossing is a sequential movement puzzle by ThinkFun where you try to cross the river by moving planks from stump to stump.
 Completed on November 21, 2013
 | Cost of Materials: $0.00
This is an advanced version of Twister that I invented. It has a triangular grid pattern with shapes and colors alternating along each line. We made three dice to roll. The first gives left hand, right hand, left foot, or right foot. The second gives square, triangle, or circle. The third gives red, green, yellow, blue, or wild.  Completed on October 31, 2013
 | Cost of Materials: $0.00
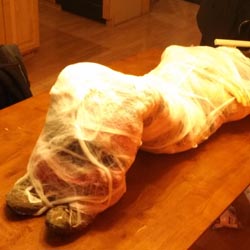
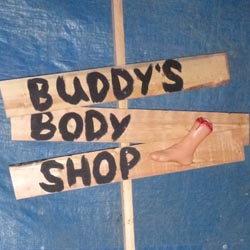 Completed on October 31, 2013Build time: 2 hours | Cost of Materials: $0.00Buddy's Body Shop is a scene similar to a butcher shop but for humans. There are lots of tools hanging on the walls, hooks hanging from the ceiling, and body parts strewn everywhere.
 Completed on October 31, 2013Build time: 3 hours | Cost of Materials: $5.00Chromadepth glasses make different colored objects appear closer or farther away than they really are. So we created a maze with different colored paper circles hanging from the ceiling. When people go through, it is very disorienting, and this lets us startle people easier.
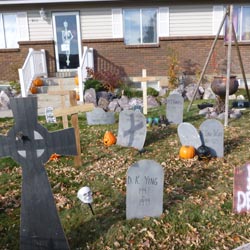 Completed on October 31, 2013
 | Cost of Materials: $0.00
 Completed on October 31, 2013
 | Cost of Materials: $0.00
 Completed on October 31, 2013
 | Cost of Materials: $0.00
 Completed on October 31, 2013
 | Cost of Materials: $0.00
 Completed on October 31, 2013
 | Cost of Materials: $0.00
 Completed on October 31, 2013
 | Cost of Materials: $0.00
 Completed on October 26, 2013
 | Cost of Materials: $0.00
 Completed on October 26, 2013
 | Cost of Materials: $0.00
 Completed on October 26, 2013
 | Cost of Materials: $0.00
 Completed on October 26, 2013
 | Cost of Materials: $0.00
 Completed on October 19, 2013
 | Cost of Materials: $0.00
 Completed on October 19, 2013
 | Cost of Materials: $0.00
 Completed on October 17, 2013
 | Cost of Materials: $0.00
 Completed on October 17, 2013Build time: 15 hours | Cost of Materials: $100.00We made this fireplace for our haunted house out of styrofoam. This technique can also be used for graveyard fence columns or any number of other projects.
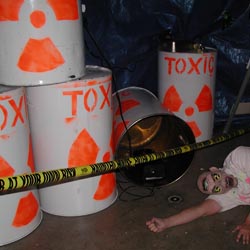 Completed on October 12, 2013
 | Cost of Materials: $0.00
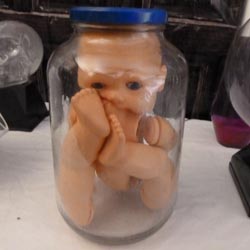
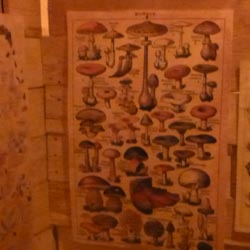
 Completed on October 11, 2013Build time: 12 hours to make 40 | Cost of Materials: $20.00These potion jars can be used in several haunted house scenes including an apothecary, a witch's cottage, or a scientist's lab, or they can be used as an indoor Halloween decoration.
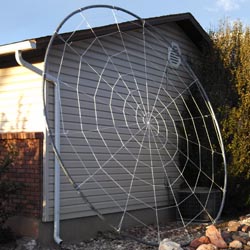 Completed on October 10, 2013
 | Cost of Materials: $0.00
 Completed on October 2, 2013
 | Cost of Materials: $0.00
 Completed on September 26, 2013
 | Cost of Materials: $0.00
 Completed on September 23, 2013
 | Cost of Materials: $0.00
 Completed on September 22, 2013
 | Cost of Materials: $0.00
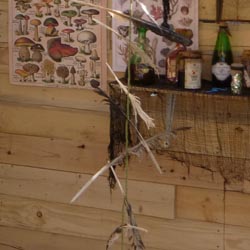
These witch feathers are a cheap and easy prop to use in your Witch Scene. To make this prop, gather a bunch of ratty-looking feathers, perhaps from your local duck pond. Take a length of jute or other authentic rope, and poke the feathers between the strands of the rope. Hang the prop from the ceiling of the Witch Cottage.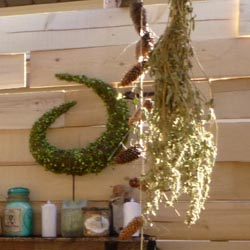 Completed on September 22, 2013
 | Cost of Materials: $0.00
The witch herbs are a quick and easy prop to use in the Witch Scene. To make the witch herbs, just gather a bunch of bundles of weeds and tie the stems together with some jute. Hang them upside down to dry and then hang them from the ceiling or mantle in the Witch Cottage. Completed on September 10, 2013
 | Cost of Materials: $0.00
 Completed on August 29, 2013
 | Cost of Materials: $0.00
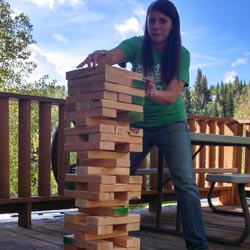
Giant Jenga is an easy and cheap Do-It-Yourself project that is sure to be a hit at your next backyard party. This fun outdoor game is made of 2x4s and is fun for adults and children alike.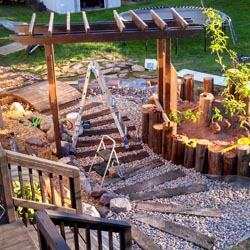 Completed on August 5, 2013Build time: 1 week | Cost of Materials: $100.00We added this simple pergola trellis over the railroad tie path in our backyard.
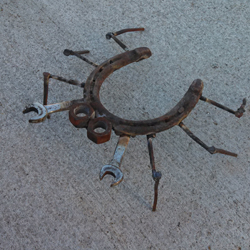 Completed on July 31, 2013
 | Cost of Materials: $0.00
This DIY crab yard art project creatively transforms a horseshoe into the crab’s body, nails into legs, nuts into eyes, and wrenches into claws for a unique, industrial-style decoration. This fun and resourceful craft adds a whimsical, nautical charm to gardens or outdoor spaces using repurposed metal materials. Completed on June 18, 2013
 | Cost of Materials: $0.00
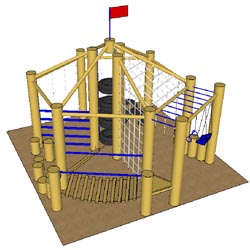 Completed on May 18, 2013Build time: 10 months | Cost of Materials: $800.00We built this awesome playground in the backyard for the kids. It has tons of fun stations to play on including monkey bars, a wobble bridge, stepping logs, tarzan ropes, climbing tires, a fire pole, a balance beam, swings, and a zipline.
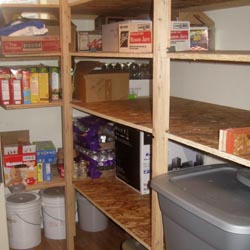 Completed on January 26, 2013
 | Cost of Materials: $0.00
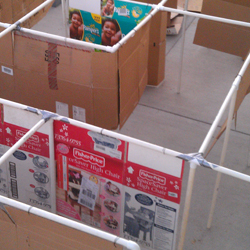 Completed on October 31, 2012Build time: 5 hours | Cost of Materials: $50.00We made a maze out of cardboard and PVC for the little kids.
 Completed on October 23, 2012
 | Cost of Materials: $0.00
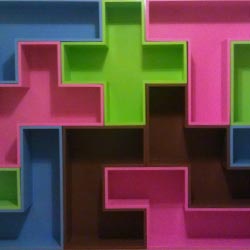
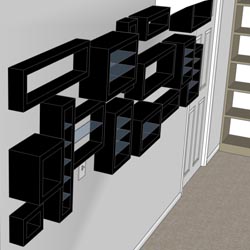 Completed on August 15, 2012Build time: 60 hours | Cost of Materials: $200.00I made these wall-hung boxes to display my rock collection.
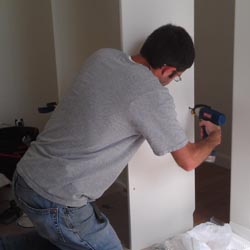 Completed on August 11, 2012
 | Cost of Materials: $0.00
I built these simple closet organizers for Savannah's bedroom. They are 16" deep. I took apart the shelves that were in the storage room and used the wood for this project. The shelves are 23" wide and 12" tall so they fit 2 cloth bins side by side.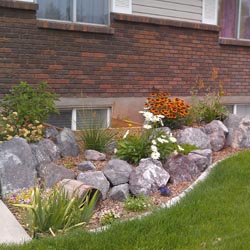 Completed on July 21, 2012Build time: 3 months | Cost of Materials: $500.00When we moved in, the front flowerbeds we flat, empty, and boring. We brought in a bunch of landscaping rocks and dirt, built the flower beds, added concrete mow strips, and planted flowers and shrubs.
 Completed on June 22, 2012
 | Cost of Materials: $0.00
This brightly colored outdoor water sculpture features a spinning metal wheel with PVC cups attached to each spoke, where water pumped to the top randomly fills the cups, creating unpredictable motion. Holes in the cup bottoms allow water to drain, adding dynamic randomness and playful charm to this kinetic water sculpture.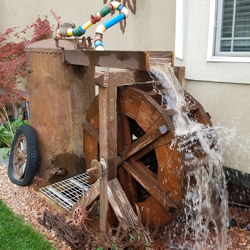 Completed on June 22, 2012
 | Cost of Materials: $0.00
This yard art project in Greg's backyard features a charming wooden water wheel powered by a water chute connected to an old rusty boiler, creating a rustic and kinetic display. The turning wheel adds a nostalgic, mechanical charm, enhancing the outdoor space with motion and the soothing sound of flowing water.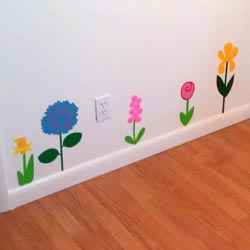 Completed on May 10, 2012
 | Cost of Materials: $0.00
 Completed on February 21, 2012
 | Cost of Materials: $0.00
 Completed on January 18, 2012
 | Cost of Materials: $0.00
I built these simple closet organizers for Savannah's bedroom. They are 16" deep. I took apart the shelves that were in the storage room and used the wood for this project. The shelves are 24" wide and 12" tall so they fit 2 cloth bins side by side. Completed on January 12, 2012
 | Cost of Materials: $0.00
 Completed on January 10, 2012
 | Cost of Materials: $0.00
 Completed on December 3, 2011
 | Cost of Materials: $0.00
 Completed on August 12, 2011
 | Cost of Materials: $0.00
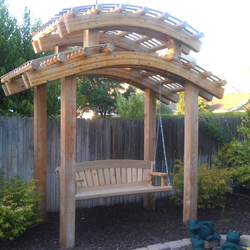
This backyard bench swing project features sturdy 6x6 posts supporting two levels of gracefully curved arches made from hand-glued laminated cedar. Octagonal cross members and wooden slats complete the elegant structure, creating a durable and visually striking swing for relaxation and enjoyment.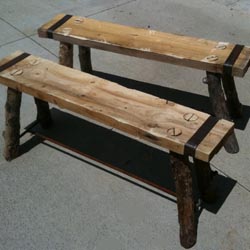 Completed on July 30, 2011
 | Cost of Materials: $0.00
 Completed on October 31, 2010Build time: 1 minute | Cost of Materials: $20.00We discovered this special effect on accident and have used it every year since. We point a dance light projector directly at the oncoming people through a hallway filled with fog. The people coming down the hallway can't see anything except swirling lights. Then usually we have a clown appear in front of them and give a startle scare.
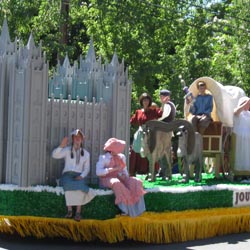 Completed on July 5, 2010
 | Cost of Materials: $0.00
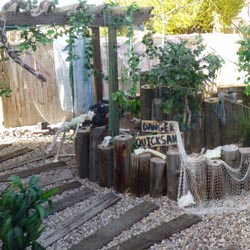
 Completed on October 31, 2009Build time: 3 hours | Cost of Materials: $20.00We did a dungeon scene in the stairwells.
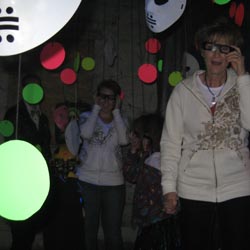 Completed on October 31, 2009Build time: 3 hours | Cost of Materials: $5.00The polk-a-dot room is a very trippy room where you hang fluorescent circles from the ceiling, and attach them to the walls. The visitors wear chromadepth glasses, which causes the different colors to appear to be different distances away. It is very disorienting, and actors can easily hide and scare the visitors.
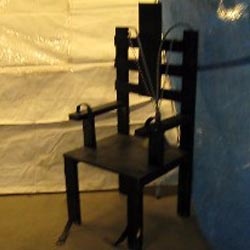 Completed on October 31, 2008Build time: 2 hours | Cost of Materials: $10.00This electric chair is a simple prop that can add a lot of flair to your haunt. It's basically just a bunch of 2x4s and plywood screwed together and painted black.
 Completed on October 11, 2008
 | Cost of Materials: $0.00
 Completed on October 1, 2007
 | Cost of Materials: $0.00
 Completed on October 31, 2005
 | Cost of Materials: $0.00
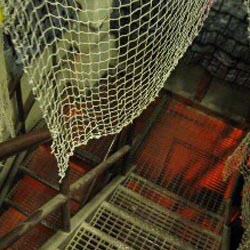
My mom painted this Jack in the Box. We set in on a card table that had a hole cut in it. A child crouched under the table could jump up through the jack in the box to scare visitors.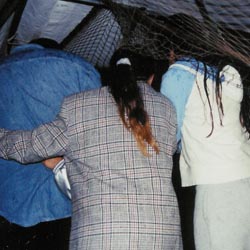 Completed on October 31, 2004Build time: 1 day | Cost of Materials: $200.00We took a carport kit from Sam's Club and removed one wall so it became a trapezoid. Then we hung up curtains and nets and bones and strobe lights.
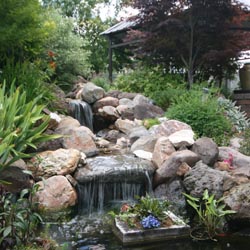 Completed on June 21, 2004Build time: 1 year | Cost of Materials: $0.00My parents built this awesome pond and waterfall at their house (with all of our help of course).
 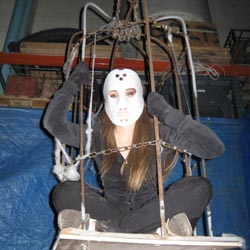 Completed on October 31, 2002
 | Cost of Materials: $0.00
 Completed on October 31, 2002
 | Cost of Materials: $0.00
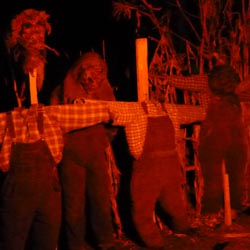
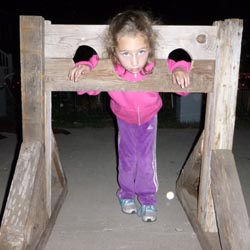
These stocks make a great addition to the graveyard scene, or they can be used as a photo prop at the entrance to the haunted house.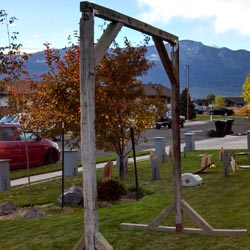 Completed on October 31, 2001
 | Cost of Materials: $0.00
 Completed on October 31, 2001
 | Cost of Materials: $0.00
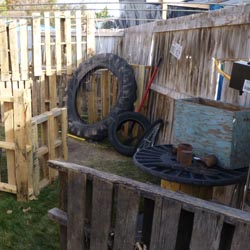
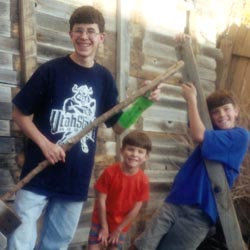
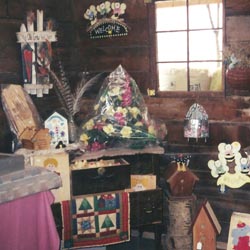 Completed on April 1, 2001Build time: 2 weeks | Cost of Materials: $0.00We helped my grandpa turn some old barns into a craft shop at his animal farm.
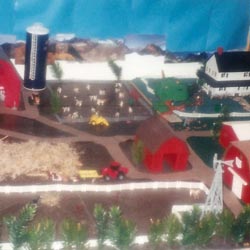 Completed on May 1, 2000
 | Cost of Materials: $0.00
When I was 13, I built a large model farm in my bedroom. The house, barns, fences, and animals came in a kit, but I added onto the kit with homemade details like trees, roads, and a large mountain backdrop.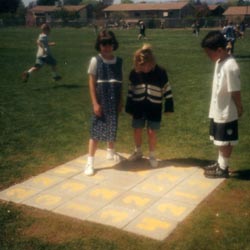 Completed on April 5, 2000
 | Cost of Materials: $0.00
 Completed on March 26, 2000
 | Cost of Materials: $0.00
 Completed on September 17, 1999
 | Cost of Materials: $0.00
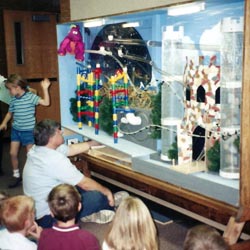
The marble maze at Sage Creek Elementary was an incentive for the students to read. The more minutes the students read, the more marbles they could put through the marble maze. The spinning wheel would pick marbles up from the bottom of each track and drop them off at the top of the next track.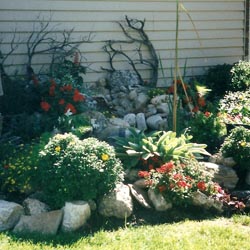 Completed on September 8, 1999Build time: 1 year | Cost of Materials: $0.00When I was about 13, I saved up my money and bought a pond kit from Sams Club. My mom and I (with help from everyone, of course) built this little pond and waterfall.